Showing posts with label Growing Up Strong. Show all posts

Monday, October 6, 2014

It's October!!!

October means several things in our house. 1. The first moth of school is over! 2. First payday since last school year!!! 3. Birthday month (7 family members have Oct. birthdays!!!) 4. Halloween time!!!

I love Halloween time! And most recently I love dressing the girls up in fun costumes! Ok they have fun too. This year we will wear  San Diego Zoo themed costumes- Colin will be a zoo keeper, I'm going as a flamingo, Lill will be a jaguar, and Fi will be a peacock. It's going to be cute. BUUUUUUT as a little preHalloween fun......

 I couldn't resist the opportunity to dress the girlies up as some classic Disney gals. Lillian's favorite non-princess is Mary Poppins. I made her a skirt, a carpet bag, and the hat and pieced together the other items. I found THE cutest mermaid costume for Fi. It was on sale and cheap and I couldn't resist. Then, it happened that our favorite hotel near Disneyland threw a photo contest! I entered their pics. Regardless whether or not they win we had fun posing for pics.

Want to help us win? Just LIKE their pics via the link below. Voting ends Monday 10/06/2014 at 11:59pm. Thanks for helping! And I hope their costumes inspire you to get your littles dressed up to play.

Our Little Mermaid
Mary Poppins

Click here to LIKE our baby Ariel and Mary Poppins!


Pin It Now!

Wednesday, June 25, 2014

The Water Fight that Healed a Heavy Heart

Sometimes you just need to have a water fight.

I know everyone says laughter can heal, but really until today, I didn't believe this. I guess I just figured laughter makes you feel ok for a few minutes, but then you're right back where you started before you began laughing. I don't think this anymore.

Rewind 11 weeks, our amazing daughter was born. Our lives changed in a bigger way than I thought it would. We've already got 1 child, how much different could 1 more be? Uh- a lot different!!!! Anyways, our older daughter seemed to be handling her new big sis role very well....too well one might say.... we held our breath waiting for the other shoe to drop. And it did, of course it did, mainly in her behavior right before nap time. Anyways, this time of day turned into a huge battle. Yes, we tried all sorts of things- even just a rest time. Still getting horrible results as nothing seemed to help. One day she'd be great then the next not so much. I write about this not for sleep advice, but so you know where I'm at right now. After almost 3 months of either a nap time battle or exhausted melt down because her sock was not on correctly, I found myself in a very fragile emotional state. I really can't even discuss it with the hubby without crying. I'm sick of watching the love of my life throw a fit every other day over something she has literally been doing her whole life- sleeping! Ah!

I was disappointed in myself for how hard I had to struggle to respond from a place of Love and Patience, which I know is what this little person needs more than anything. I know that in her tears, though she is saying, "Go away!" what she means is, "Why wasn't just having me good enough for you? Why did you think I needed a sister? I need your attention, mommy. Don't you know I love you, but I'm mad at you. I don't know how to handle those two emotions at the same time yet, please help me." Knowing this, also made me feel so much more awful for the times I've lost my patience. So I settled into what I thought was my new skin, just get through the day, make sure everyone is clean, fed, and having fun. But, this isn't me. It's not the girl my parents raised and it's not the woman my husband married. It is absolutely not the mom I want to be- just getting through the day!


So today, my sweet girl got her mommy back. It was like a ton of bricks just lifted off my heart. We went outside to play, this afternoon, on the grass. I noticed our tomato plants needed watering so I brought out the garden hose and let her have at it. While she water watering I began to pull up some grass that had sprouted on our bank (I'm constantly battling the grass there!). She then, accidentally, sprayed my feet- truly an honest accident. It was that moment I chose Love. It would have been easy to say, "That's it! No more watering for you, missy!" But I didn't. I'm SO glad I didn't.  responded instead with a silly, "Hey, watch out I'm gardening here! I don't want to be dirty or wet! So you better not spray me agaaaaaaaiiiiiin." Of course, she instantly caught on to my teasing and sprayed me again. She laughed SO hard- that belly laugh that melts my heart. I laughed SO hard. Harder than I've laughed in a while. The water fight ensued. And, we both couldn't stop laughing.

Colin arrived home from work, mid-water fight and gave me that knowing look of how much we needed that water fight. Then Lill and I sprayed him in the face and we all laughed until it hurt!

Pin It Now!

Saturday, June 14, 2014

1+1 >2

Yes, I know, 1+1 =2.... Normally. The basic properties of addition do not apply to having multiple children. I have learned this over the last 2 months.

9 weeks ago we met this little squish for the first time!!!


She arrived exactly on time, well if you know my family that means 10-30 min late. (I'm working on it ok! But I'm back a square 1 again with the newbie here!) she came 26 min after her due date. But, I cannot complain because she arrived very quickly and uneventfully, which in my book is a great delivery! At 6lbs 12oz 18.75" she is healthy and figured out nursing pretty quickly resulting in a 5lb 9oz increase in weight over the last 9 weeks!! She also spent that time growing 3.75", which explains all the sleeping and kicking! 

So, like I was saying 2 kids doesn't equal 2 times the work. It is more like 3 or 4 times depending on the time of day and mood of the kids. No one tells you this before hand! (Not that I would have believed them anyway- maybe someone did try to warn us then and we disregarded this piece of wisdom. Oops!)

Aside from the overwhelming exhaustion, that somehow your body just accepts as the new norm, Colin and I both have started to find a rhythm and flow. We've are pretty sure we could negotiate someone down off a ledge. A three-year old is an endless negotiation situation. We can also do even more things with one hand than we could when Lill was a newborn. We've got this whole nb thing under control. It's the three-year old thing that throws us for a loop every few days!

All that being said they are wonderful sisters. 
Lill has takes her big sis role very seriously. She pops pacifiers into her screaming mouth and tries to comfort her. She has explained the rules about the cats: not pulling fur or tails. She has helped with poopy diapers and bath times. And everyday she tells her how much she loves her. I hope that this relationship will grow and serve them well their whole lives.


So, even though it's definately more than twice the work, when I see my girls doing this it makes be forgot about the work and I just melt. I'm proud of them and have more love in my heart than I ever knew possible.


Pin It Now!

Thursday, May 1, 2014

The Good and the Bad

Sometimes it is important to remind yourself of things you are good at, especially when there are times all your short-comings seem to be bopping you on the head. It is also important to really sit your short-comings down and have an honest conversation with them to see if improvements can be made. So here we are.

Kerry, you ARE good at:

Cooking (most things)
Teaching
Being honest
Polishing silver
Bargain hunting
Negotiating
Organizing
Packing (suit cases, cars, moving boxes)
Multitasking
Traveling
Math (according to me, not my GRE score!)
Reading
Pushing out/having a baby 
Putting together IKEA furniture
Breast feeding our baby 
Throwing make believe tea parties 

Things I'm working on, but kind of suck at right now:

Being a consistent blogger
Getting my little one and newborn up and dressed and out the door on time in the morning 
Putting away the clean laundry
Finding time to clean the house AND play with Lill
Finding patience even though I'm exhausted.
Getting to church regularly- I love my church, but I just haven't been able to get there- see above & below.
Balancing time between two children- I think this is the biggest issue right now.
Remembering to make a shopping list
Burping a baby- thank goodness for my husband

So just in the short time it took me to write this, I already feel better about many of these things I'm working on. Others will take time to fix.  Knowing that I can control my thinking and perspective on them is a big step in bringing about change. Until then I can't just sit and wait- there are diapers to change and princesses to be rescued!!! I


Pin It Now!

Friday, July 26, 2013

Up-cycling Onesies

Today, I finally got around to a project I've been wanting to do for months. (I love summer!) I was inspired a while ago by my friend, Heather, who did something similar with her son's onesies. (Check out her awesome cloth diapering fluff on her business's fb page or here!)  I made some old onesies into t-shirts and a dress.

Our sweet baby is officially growing up and potty training. Onesies are not the best wardrobe choice for the potty training 2 year old to manage. I have not been super impressed with most of the t-shirts I've seen lately. They're either plastered with junk, overly sassy phrases, or out of my price range for a toddler's t-shirt. I do, however, like the prints of many of the onesies. I also like that they are easy for my, "I do it all myself, Mama!" girl to get on by herself. The wider head hole doesn't hurt either. I also like that I own these already so in my brain that means they are free.

This was crazy easy. You may have seen other DIY posts on this, but this is how I did it. I hope it helps you on your quest for making more with less!

I spent a little less than an hour and ended up with 8 "new" t-shirts!!! I was on a roll (and Lill was sleeping) so I also threw together a dress made from one of the onesies and scrap fabric I had. The dress took about an hour, mainly because I wanted to make pleats and I'd never done them before so I was figuring that out. I bet it would take 15-20 min less for the next one.

Want to give this a try? Here is what I did. I hope it works for you!

Onesie Up-cycle T-shirt

Materials:
Cute onesie
Sewing machine and thread
Iron
pins
scissors (or better yet a rotary cutter & cutting mat)


Steps:
1.  Cut off the bottom of the onesie as close to the leg openings as possible.

What to do with the snap part??


2. Get your iron warmed up and give the onesie a once over. (Be sure it is inside out.) Then turn up the bottom edge about 3/4" and press. I do this first to be sure my bottom hem will be nice and
straight. Now, you have 2 options. I did it both ways and bother are suitable.
              a. Leave this as is and go on to step 3.
              b. Fold the raw edge under so it touches the inside of the hem you just pressed and press again. This will  give you a finished hem on the top and the bottom of it. I'm sure there is some technical  term for this, blah blah blah.
This is the hem as it looks on the outside of the shirt.
3. Using a straight stretch stitch, sew the hem all the way around the bottom of the shirt. Press the hem once more to set the stitches.

BAM! T-shirt! You're done! See? It is super simple!
8 "New" shirts!

Onesie Dress

To do the dress follow the above directions- I used option A for finishing the hem for the dress. Set this aside.

4. Then, using pretty much any coordinating fabric cut it to the desired length for the skirt. I wanted it to be a bit longer so I made it 9 3/4" AFTER it was hemmed. I cut 2 pieces of fabric to 11 3/4" x 34" and laid them right sides facing each other and stitched them together to make 1 long piece for the skirt. (This proved to be a little longer than I needed, but it was better to have more than not enough length.) **I made box pleats, so I needed more fabric. If I hadn't done pleats probably 1 piece at the above dimensions would have done it.** Here is a box pleat tutorial. I didn't do each other the steps in this tutorial, but read through it, got the idea and winged it. It worked fine for a 2 year old's dress. ;)

5. Hem the piece of skirt fabric on the top and bottom edges. I made a 1/4" hem at the top and a 3/4" following option B above.

With pleats: If you're doing pleats, use your iron and pins to set the pleats along the top. Press them really well and pin after each one. On your sewing machine, run a stitch along the top where you pinned to secure your pleats. Remove the pins and press one more time.

Without pleats: If your fabric is stretchy, run it through your sewing machine with a straight stretch stitch, but stretch it a bit so that when you release it is bunches up a little. This will look super cute once you attach the top.

Fold the skirt in half printed side to printed side and line up the edges. Secure with a couple pins. Sew the seam.


8.  Attach the skirt to the top you set aside. With the top right side out, pin the skirt to the shirt. When you're pinning the skirt should look like it is flipped up with the underside showing.

9. Sew the skirt and the top together on your machine. Iron the seams, remove all pins (duh!), snip all loose threads.

BAM! Dress!

Notes & Tips
I used size 18 month onesie for the dress & t-shirts.
You can use either the jersey type onesie or the more stiff t-shirt type. The first t-shirt I did was the latter- it was a little easier to work with until I got the hang of it. The jersey is more stretchy, but still manageable.

Happy up-cycling! Pin It Now!

Saturday, November 10, 2012

Super Simple and Super Cute and Our Super Fun Halloween!

Halloween time was a whirlwind of a time in The Stronghold. The weekend before, we took our first airplane trip to South Carolina for my brother's wedding- more details of that adventure to come. So needless to say I was very behind on making our Halloween costumes this year. All my life I have worn homemade costumes- not once- ever, have I worn a store bought, packaged in plastic, made of paper thin polyester costume. It just worked out that way. It was our family tradition as a kid to head over to the fabric store and flip through the pattern books to choose the perfect get-up and then pick out the fabric. My mom is a wonderful seamstress and passed on that sewing to me, though I'm not as skilled as she.

Anyways, mix this with my type-A attention to detail in costumes and throwing something together the night before isn't easy, but I made it work. We'd planned on dressing up the toddler (!!!!!) as Jessie from Toy Story. I had several of the parts of the costume, but when we got back from Charleston it was my job to put it all together. Since our flight was delayed getting home I had 1 less day to do this. The costume still came out great. Below is what you'll need if you're so inclined to dress up you little one as a cowgirl or cowboy next year.

We kept our Halloween night SUPER simple this year. We had homemade pizza (thanks to my MIL) and Mummie Dogs (thanks mom) and witches fingers for dessert. There aren't many trick-or-treaters in my in-laws neighborhood so it was a pretty quiet evening. Ok- actually there were I think only 4 kids ALL NIGHT!!! So pretty much we just sat around the fire pit and watched our little Jessie run around "Yee-Ha-ing!" It was actually very refreshing to veg out after our big trip and after a wild day with my 3rd graders at school. Sometimes- no, a lot of times- less is more.

Here comes November!!!!!!

 Jessie Costume Materials:
Cowboy boots
Cheap pair of jeans
Long-sleeve white collared shirt (I used a boy's onesie)
Brown belt- attach a big western belt buckle to it for added cuteness
Jessie Hat (we bought our at Disneyland)

1/2 yard of yellow cotton fabric
1/4 yard (maybe more if your child is bigger) cow print fabric
red roping
fabric glue
1 package Heat n Bond Iron-on adhesive/ fusible interfacing
Peal/silver western style buttons 4-6 *optional for the detail freak ;)
2s sheets of newspaper to make your patterns
Iron on Velcro dots or strip that you'll cut into 1/2" squares
Red marker, fabric chalk or pencil

Prep your fabric:
I always wash & press cotton fabric before I sew it. So I did this a head of time.

**I didn't want to have to sew hem/seams to prevent fraying because honestly I didn't have time. You totally could do this, but I think the way I did it was much faster and it came out perfect. (If you were going to use this as dress up and needed to wash it many times though taking the time to cut out the pattern and then hem the edges of the yellow fabric may be worth it.) For Halloween it wasn't worth it to me.

1. Cut the yellow fabric in half. You're going to fuse these two pieces together to make a nice crisp, but flexible piece to cut the pattern from. To do this just cut a piece of the Heat n Bond to the size of the half. Follow the directions on the package for ironing temps/times. Peel off the paper backing and then place the other half and fuse them together by ironing again. *Now when you cut the fabric won't fray! :) Side note: before you fuse the fabric do a rough check on how big you'll actually need it to be for your child. I was able to cut the shirt piece and the two cuffs from doing it this way, but I have a little bitty 18 month old... I trimmed out the pieces in rough squares so I didn't need to fuse more than I'd use. Make sense? I hope so!

Making the Shirt: 
1. Take one piece of newspaper and fold it in half. Hang the white shirt on a hanger and poke a hole in the center of the newspaper (on the fold) to poke the hanger through. Trim the news paper so the edges go just to the shoulder seam on the shirt and so that it goes down the front and back just to below the arm pits (a little farther down in the front than the back since you'll be trimming more off the front to shape it.). Also mark how wide the neck hole needs to be.
2. Take the newspaper off and use a pen/pencil to outline the front edge of the yellow piece for the shirt. It kind of makes two shallow arches. I just did my best at eye-balling it. The points should end up where a pocket would be on the shirt.

3. Pin the newspaper to the yellow fabric (the pieces you fused together already) and cut along the lines you drew and the edges of the newspaper (where you trimmed it up to fit the shoulders). Remove the paper and cut out a neck hole. **You will need to make the neck hole bigger by cutting a slit down the back- just see how big of one you need for your kiddo's noggin' before cutting. Big heads gallop in our family! Give it a test by hanging it back over the shirt to see how it fits- trim accordingly.
4. Cut out, from the scraps of this, 2 rectangles approx. 2"x 8" for the cuffs (again if you're not sure on the sizing make a test run with the newspaper to assure a good fit). Sew on 1 button onto the end of each and cut a small button hole. *Be sure to fit this to your child's wrist before cutting the button hole so you can size it correctly. I also glued on a small piece of felt I'd cut to look like fringe. (Details people!) Use a red permanent marker to draw the loops on the cuffs. I guess you could use roping here too, but since our cuffs were so small the roping was a bit to bulky.
5. Use the iron on Velcro dots or cut pieces and apply them to the corners & middle of the yellow piece so it attaches to the white shirt. Iron the other part of the Velcro onto the shirt. I did this on the front and the back. I also added a piece where the slit is on the backside so it would stay closed after putting the thing over her head.
6. With the yellow fabric removed from the white shirt, use fabric chalk or a yellow highlighter to draw on where you'll glue the red roping. If you're awesome you can just wing it- I'm not. (Actually my hubby did this part, and it was a good call since he is also a perfectionist.) Then glue on the red roping in the same looping way as it is on Jessie's shirt. This will need to dry for several hours- over night is best.
7. **Optional Detail: If your shirt has buttons, remove the 2 that will show once the shirt is tucked in and the yellow fabric is in place. Attach the cute pearly buttons in their place.

Making the Pants/Chaps: (this is the easiest part and only take about 5 minutes)
1. Lay the cow print fabric out flat on the cutting board and then lay the jeans on top. Use fabric chalk or a pencil to make an outline of just the pant legs. The chaps will start just at about the same level at the crotch of the jeans and be the same length as the pant legs. Round the the corners on the bottoms. 2. Cut out the chaps. Cut out 2 small pieces of felt to make the fringe- glue onto the backside of the chaps on the outer edge.
3. Cut out two pieces of Heat N Bond the same width as the top of the chaps and about 3" long. Iron each piece onto the top edge of the chaps. Remove the paper baking and place the chaps onto the jeans where you want them to be. Iron the part that has the Heat N Bond on it. BAM! Jeans with chaps!


Sorry if my directions are a little vague and not with exact measurements. I hope you can follow them if you're looking for a way to make an adorable Jessie costume. It seriously was so fun to watch our daughter love wearing her costume. It was comfortable for her to wear and cheap to make (especially if you have some of the sewing materials laying around and if you buy the shirt/onsie, belt and jeans at a thrift store)

Happy creating!

Pin It Now!

Friday, September 21, 2012

Summer Time Fun

I'm so blessed with a career that allows me to just be a mom for 2 months out of the year. (Please note that teachers only get paid for the days they work- so before you get all cranky about how you work all year keep in mind that you also get paid all year.) I absolutely love teaching. I'm passionate about giving ALL kiddos the access to high quality education. That being said.

Teachers are people too. For 2 months out of the year I get to just be with my family and not worry about other people's children. I get to rediscover the things I enjoy doing in my personal life that always get put on hold during the school year. I can devote 100% of my attention to my family, which Lord knows doesn't happen, as much as I try, during the school year. Even most weekends during the school year get filled with things to do for school. I get to relax, stay up late to watch movies, get up early to go running, reorganize my house, cook dinners that aren't ready in 30 minutes, and my favorite- part play all day long with our daughter. Summer is a magical time for me and if it were a location, rather than a season, I think it would be in Neverland... If you just squint your eyes you can see it all year in the not too distant future.

So. This summer is extra special. We won't take an official vacation, we didn't pack our schedule with things to do all summer. We are just playing it by ear week to week and day by day. The only place we have to be is at swim lessons twice a week. It is very freeing for me since all year I'm literally dictated by my iCal. (I couldn't get to all the places I need to be without it during school.) Here are a few highlights from our summer so far.

Talking, talking and more talking! Lill is such a chatter box! She went from saying mostly nouns to adding some adjectives and verbs and now she has complete and compound sentences. She also has big opinions about everything. She started changing the tone of her voice depending on how she feels about whatever she is saying. For example, "Hi." became "HI YA!!!Mama!!!!" *my heart melts for this one, especially when it is followed by a huge hug* 

Road trip! Immediately after school was out my dad, Lill and I took a road trip. We visited Santa Fe, Carlsbad Caverns, and Sedona. I learned that my daughter is a fabulous traveler! My mom's trick of the car bag full of new books & toys worked great!! The travel potty was also super helpful since she is almost potty trained- only 4 wet diapers in 1 week!

I love making homemade ice cream!!! Summer hits so far: chocolate with marshmallow fluff & pretzels, vanilla chocolate chip with black cherries, and mint chip. I will post recipes soon. 

The garden is bursting with zucchini, cucumbers, basil, mint, jalepeƱos, and watermelons. Our tomatoes are almost ripe and that means it's almost time to make fresh mozzarella! I'm also excited because we tried growing watermelons this year and we have 3 almost ripe ones and 5 little ones on the way!!!!!! I cut one open today. They need a week or so more. It's so tough to tell if they are ripe or not!
 
What do you love to do during summer with your family?

Pin It Now!
Tuesday, August 28, 2012

We're Taking the Challenge!

How many times do you think you use your dryer each week? For us it was usually 3-6 times!!! When it was SO stinking hot here in July I just couldn't bring myself to turn on the dryer. I found a clothes line and started line drying everything. I loved it! The clothes were coming out a little crunchier than I'd hoped so in doing some searching for what to do, I came across a very fun blog! They happened to be doing monthly challenges and guess what August's challenge was? No Dryer! I wasn't brave enough to post this before bc I wasn't sure how long this no dryer thing would last for us, but it's been over 5 weeks now and I'm not missing it! Colin is even into it! So here's to the No Dryer Challenge- we did it and probably will keep it up for months to come!!! By the way, adding less detergent to the laundry made a big difference in how crunchy the clothes were once dry.


So for this month the next challenge is "Eat Your Pantry" Something we need to do. I know there are the makings for lots of good meals in there I just need to cook the stuff! Going to spend some time this week coming up with meals (or side dishes more likely) from what we have in there.


Pin It Now!

Friday, August 3, 2012

What We Don't Do

"Sometimes I think what you don't do has a just as big- if not bigger- impact as what you do do." This thought popped into my head the other day as I watched my sweet girl have one of her first melt downs. I don't mean to say that doing things doesn't have an impact, of course it does. But, sometimes the things people don't do, especially when it comes to their children, can greatly impact (positively & negatively) the children's lives. I'm sure we could brainstorm tons of examples. I'm not going to. I'm just going to say that when I see children struggling in their lives a lot of times it's caused by things the adults in their lives aren't doing. It's also true that when I see successful children there is a list of things their parents aren't doing also. I guess the implication for me reflecting on this, as a new parent, is to be aware of the things I'm not doing. Then decide if by not doing these things I'm benefiting my children. Food for thought. Pin It Now!

Monday, April 23, 2012

How do you measure a year?


Seriously! The fastest year of my life just happened.

So, I feel like I'm not alone in the "Yep, I went through a RENT phase......" (No shame!) I was thinking about how to measure this past year and tapping into my past love affair with RENT seemed slightly appropriate...

 This past year has been measured in....

Weeks, months, days, minutes, seconds, and lots of contractions.
Us!
In tears (Lill's and ours), 2 hour nursing/sleeping schedules, and ounces of precious milk. 
In visits to Hemet, trips to Disneyland, and skillfully packing a car for camping.
Papa Lee and 2 week old Lilly
Sleepy smiles
Sometimes all you can do is rock.

In tummy time, tubby time, and first smiles and giggles.
In diapers, in bottles (not finished), in stuffy noses.
In quiet moments at 2am and Saturday morning snuggle time.
A perfect day
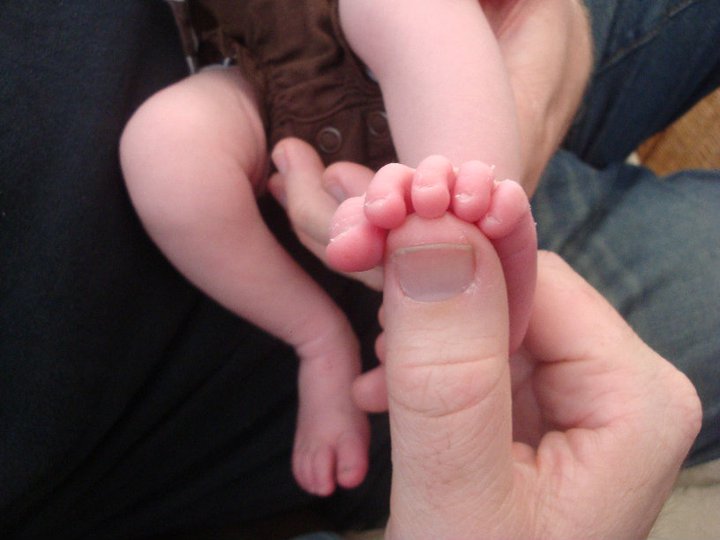
Baby toes!


Really, it doesn't get any better.
On the move!
In rolling, scooting, and finally crawling!
In pointing, babbling, and first words, Dada, tat (cat), a-dog-a (dog), and finally Mama!!!
Beginning to stand up

Practicing hunting for eggs
In teething, and standing, and stepping around.
"Hello? Grandma!"
Happy St. Patrick's Day


In sloppy kisses, in hugs, and in those big baby blue eyes!!!


Measuring in love doesn't even begin to explain it!


Look out I'm ONE!
 Thanks VERY MUCH to everyone who has given us support in our first year as parents. We are loving every minute of it!!! (Yes, even at 2:30am.) Lillian you are better than we ever dreamed you would be, you make us smile every day, we have fallen deeply and madly in love with you, and we treasure every moment we get to be with you. God bless you Lill!


Pin It Now!